Thursday, August 20, 2015

MEAT CHICKENS. HOW DO I LOVE THEE.. LET ME COUNT THE WAYS.

WARNING! Some chicken images may be graphic.

Well my friends last week I killed, plucked, and cleaned my first chicken. Yes that may come as a shock... but hey, better late than never eh? 

Heck the day had to come some day, I have been dreaming this whole meat chicken project thing up for about a year now. And holy cow is there a whole heck of a lotta work involved. Honestly more than I ever expected... 

Spencer was supportively reluctant at the thought of adding more animals and more responsibilities to say the least...

"But honey this is the next thing!"

"Q, what's the next thing?"

"Broiler Chickens!!! The next thing we need to incorporate on our homestead for self sufficiency!!! And... I just watched this crazy video that turned me off store bought chicken for good... I must have meat chickens! I must have them! I must!!! Muhahaha!!! Plus look how cute they are as babies!!! Honey you know how I love babies."


Ok I didn't really laugh like a villain, but really, as I add homestead hack after hack to my awesome bright shiny homesteaders belt, I feel somewhat like I'm conquering a new world.... What's that you say? Don't you all have one of these shiny belts?.. Ok that part IS make believe, and yes its okay for adults to have imaginations to. 


Homesteader's really aren't marked with shiny belts or fancy badges to set us apart. We're marked with skills, hacks, rabbit scratches, poop, dirt under our nails, 476 runs to the feed store, hours of research, more poop (only this time its from a tiny human), hours out in the cold/heat with our animals, gardens, or broken vehicles.... Anyone can do this just like we do, but not everyone will. 


Meat chickens, are my ode to this homestead life, a messy messy job.. Yes I could buy organic chickens from the store. But for some weird innate reason unknown even to me I've discovered I would rather kill, process, and cook a chicken from my own farm and through my own hands. The feeling I got after it was all said and done, I want that feeling everyday for the rest of my life. 


A little sappy for ya? What can I say I love my homestead and this lifestyle.. I'll yell it from the rooftops! I'm proud of my birds, don't hate.

Yes I love chickens, so, bringing meat chickens to the homestead was an obvious next step. As much as chickens are amazing, beautiful, lovely, funny animals, and it is no doubt they are some of the best farm animals. Commonly referred to as "the gateway drug to farming," chickens are many a thing, but there are some things that chickens are not.


Things I've learned, relearned, and decided about chickens are as follows;

Chickens are not clean.. They poo everywhere.. their water, their food, your back porch, the laundry...nothing is sacred to them..

Chickens are not smart... They'll drown in their drinking water if you give them the chance.

Chickens are not easy to catch... unlike ducks, chickens do not flock well..

Chickens are terrible landscapers..they don't care if your flower beds or yard look pretty... They'll scratch up and dust bath away all your hard work if let to free range.

Chickens are not very polite.. They'll come right into your front door if you aren't watching out.. Look back at my post about chickens IN my house last fall.

Chickens do not understand personal space.. "What't that in your hand?  A bucket with feed? Well let me just flap all over, scratch you, and jump on your head..."

Chickens have terrible instincts sometimes.. "Oh my stomach can't digest grass and my crop will get impacted if I eat it? Well, a chickens gotta get sour crop sometime, screw it let's eat a bunch of grass!"


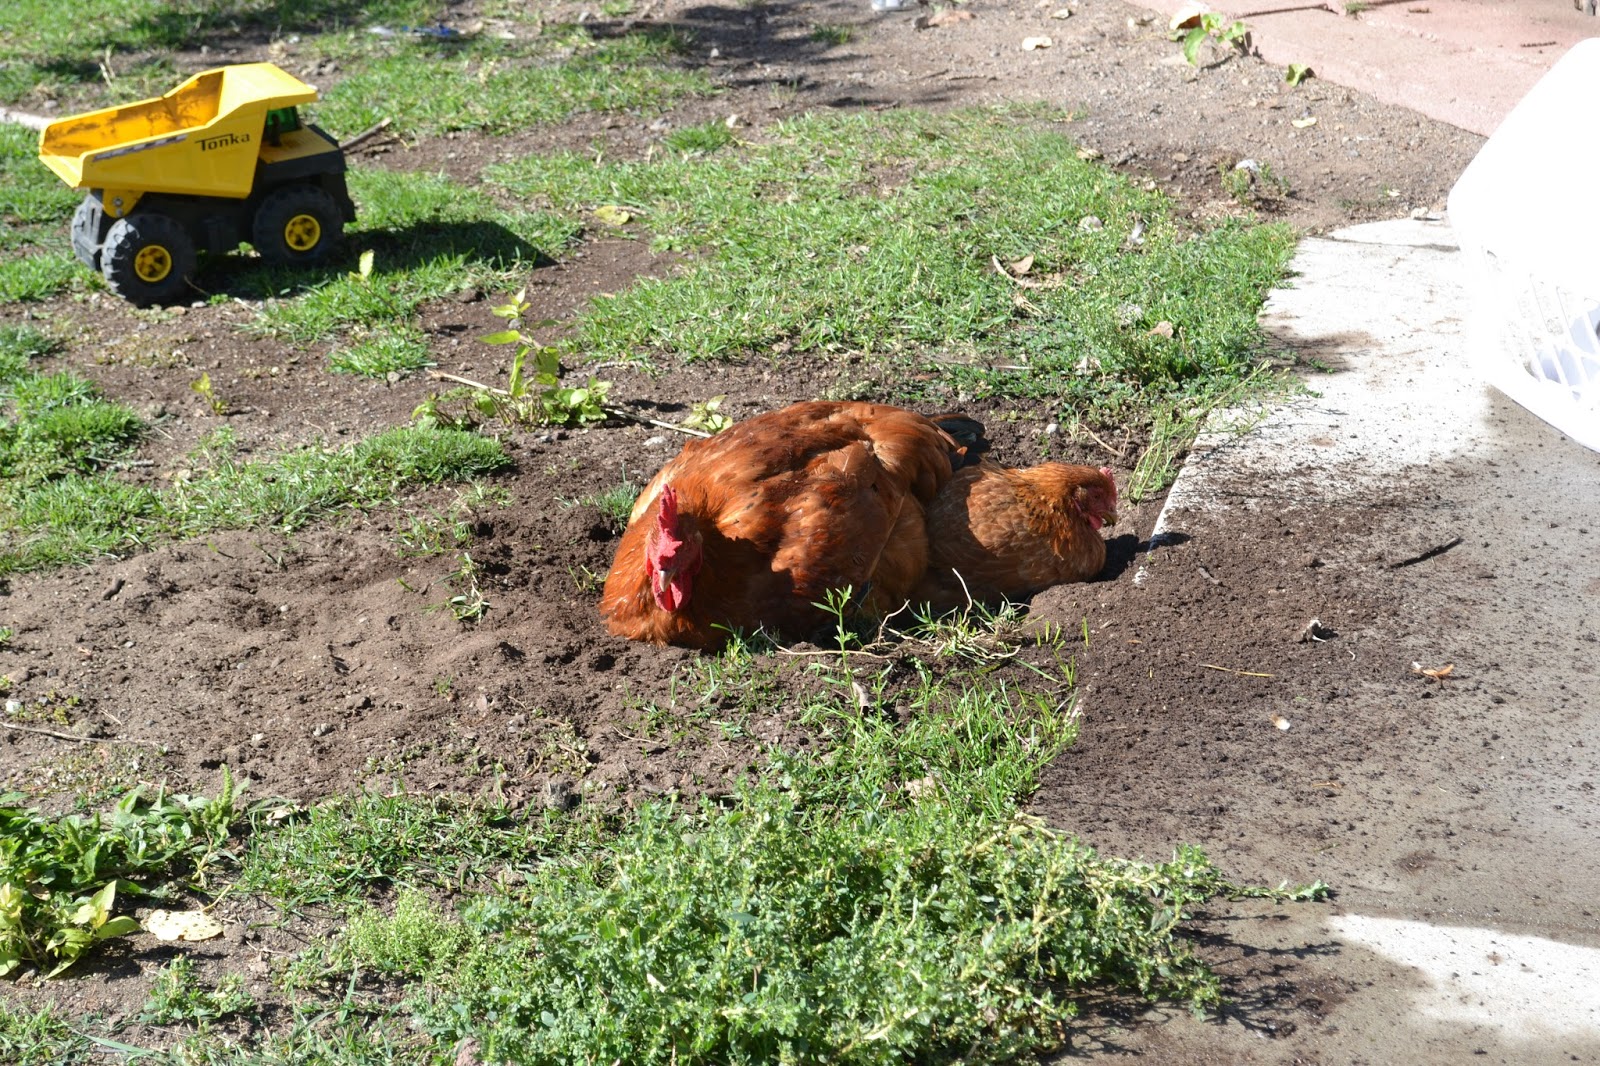
You see, chickens can die so easily they are practically suicidial, this is why its so easy to loose chickens in all sorts of ways. So they must be cared for accordingly, still seem like the easiest farm animal? Chickens are a commitment, especially meat chickens. A big commitment, but with such great pay off. 


I say this only because I jumped in head first.. without a plan, without much knowledge of food to weight ratios for growing at the fastest rate, without knowing exactly how much square footage per bird for foraging I would need, and never having killed and processed any animals before..nerdy stuff like that...


All the things I've learned in the last 4 months has left me yearning' for more learning'! ? Here's a taste of some of my new knowledge about the birds;

I learned what products to use and when to worm the birds, I also learned the meat birds should be wormed every two weeks after the initial dose. This is to maintain a worm free bird, we used a simple liquid wormer, which is easily added to their water. 

I learned about sour crop/ impacted crop and of a condition called pendulous crop, which is caused from chronic stretching of the crop muscle. All of these condition which can be avoided with proper access to grit and scratch to aid the crop in digesting food. 


I learned that chickens cannot digest grass (as my chicken narration stated before) or other long vegetation, since it does the former and causes issues with the crop.

I learned how and what temperature to scald the chicken to remove feathers the easiest... I also found the plans for a homemade chicken plucker which will be added to the 'homestead TO DOs' list..

I learned that the birds really need to be killed before the roosters start to realize they are roosters and begin beating each other up.

I learned that they need to have a good source of shade from the heat in summer and need twice as much water since they pant like dogs. 

I learned that with meat chickens, more space is always better. The ground won't suffer as much, the poop won't smell as bad, they run less chance of tearing up the ground, and they will have better access to grit and scratch. 

I also learned the stage of barley fodder at which the chickens enjoyed it most.. about day 3-4, before the grass has come in and just the root mat exists yet.

I learned the fastest cleanest way to make the kill. And too make sure you let it bleed all the way out before scalding..

And hell I learned how to completely pluck, clean, gut, skin, and preserve those little mother cluckers. I say that is a pretty darn good accomplishment looking back on the process. 

Most of all, I learned that patience is key while learning to master a new skill. Skills are after what drives homesteading in a way. Learning to do things you formerly couldn't to become self sufficient. In a sentence isn't that why we're all here? To get back to basics.
You see folks, this is why I blog. I blog to save all my progress in one place for y'all to see... And hopefully learn from my mistakes. I want to show you this life is possible on a budget. I want to show my kids one day how we made it to where we're going. Where it all began. 

Yeah this post is turning into my love letter to homesteading than about chickens... A love letter I want to keep writing. About my kids. My animals. My bearded love. Our crazy projects. Ups and downs. And our quirky crunchy organic country lifestyle.

I saved the graphics for last, so scroll on, only if you dare.
Photo credit: KC Vipperman, Quincy Burke




Monday, August 17, 2015

ORGANIC PEST CONTROL. RIGHT FROM YOUR KITCHEN.

This post contains affiliate links.

Man I tell ya, if theres one thing I gotta say about homesteading... It's that it is tough. Don't get me wrong I love spending my days weeding and cleaning up poop of all kinds... Ahem, moving on...

When I began my organic nonGMO gardening adventure it crossed my mind that it would take more than some light reading and buying some fancy seeds. Along with many other worries I knew there would come a day when pests would appear.

Here on the right you'll see my organic broccoli starts once they were transplanted outside this spring. Looks like it has potential right?

Well folks, that day I'm talking about came a few weeks ago. When I noticed the devastation of my broccoli one morning. I spent much of my days the next two weeks squishing cute little green pillars and burning leaves whose undersides were covered in little yellow eggs. Inspecting the potatoes for beetles became a rather fun pastime... but really anything to escape to the garden if only for a few minutes more each day.

Well to no avail I gave up on that remedy, it was going to take much more to stop these bugs. Trying to find a a chemical free, nonGMO, organic, etc. pesticide is near impossible so I opted to do some research and find a recipe to make from home. Here's what I came up with...


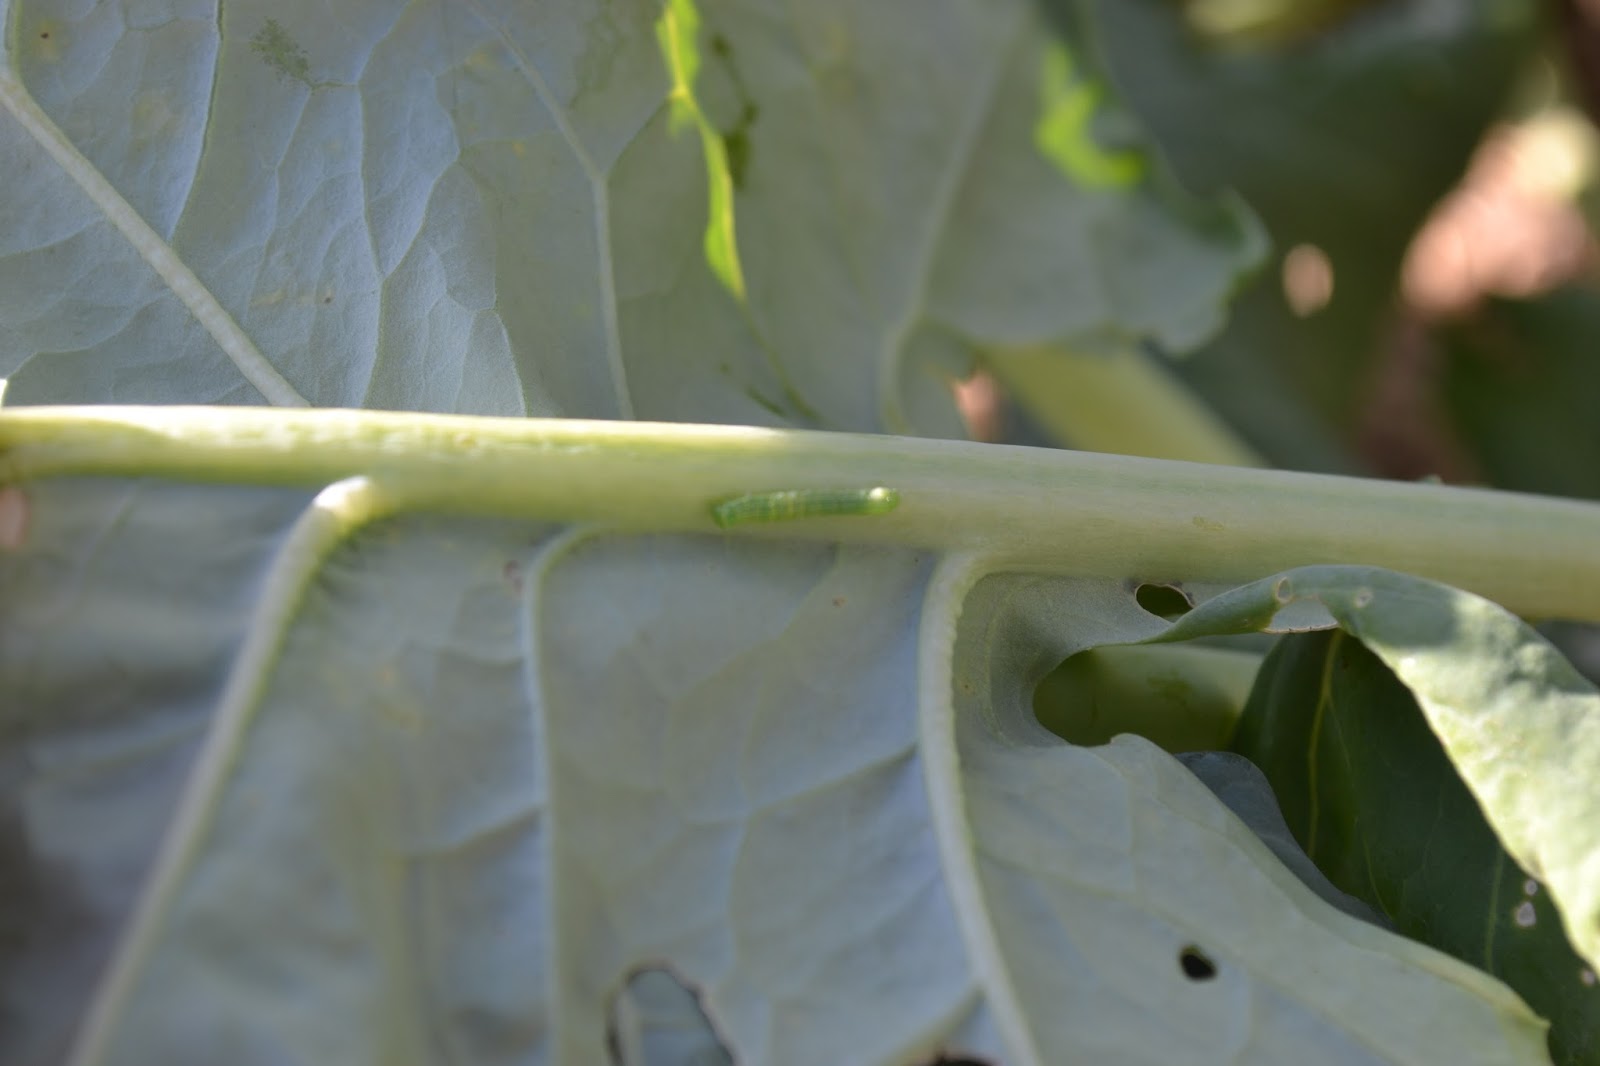
To the left you'll see some of the broccoli that was literally being eaten alive by these cute dumb bugs! You can notice how most of the leaves have holes eaten through, some bad enough have full sides and edges eaten away.


There's one of the little buggers now!


Seems pretty harmless huh?


Think again my friends...


These clever fellows will eat your plant with an insatiable veracity that can be tough to beat, while laying eggs like crazy and grow quickly.

ORGANIC PEST CONTROL

Basically you want this spray to be stinky... Im talking scare even people away kinda stinky... Please folks do as I say, not as I do... Meaning wait for the wind to die down before you spray this!!! Trust me.. I got down wind of this stuff and its a perfume you don't wanna sport. Moving on..


INGRIDIENTS:

1       organic yellow onion
4-6    cloves of organic garlic
2       tbsp organic cayenne pepper
2       tbsp castille soap
20     drops peppermint essential oil--- looking 4 Certified Therapeutic Grade oils? Email me!
1       spray bottle
1       gallon jug
1       fine mesh colander/bag or cheese cloth

PREPARATION:

Add onion, garlic, cayenne, (all of which was purchased at my favorite of stores COSTCO! They carry so many organic and NonGMO Project verified foods...just FYI) and essential oil to your blender or food processor and blend completely.

Let sit for a couple hours or overnight if you prefer.

Once it has settled strain through either colander, bag, or cheese cloth... I used a reusable mesh vegetable bag from MightyNest.com since I didn't have a cheesecloth or mesh colander fine enough.


Strain mixture into a mason jar.


Transfer the liquid into a gallon repurposed gallon milk jug.

Add the castile soap (we use Dr. Bronner's purchased through Amazon.com) and water enough to fill the jug.

At this point you can store the gallon up to a week, transferring whatever amount into the spray bottle for application in your organic garden.


It is sure stinky but I tell you this stuff works! Spray on the undersides of the leaves on plants who are being pestered the worst. I don't put it on everything in the garden, just those who really need some defensive help. Avoid spraying directly on fruits and veggies if applying when your garden plants are in flowering stages as to avoid changes in taste. But by all means spray tops and bottoms of leaves to ensure no pests lay eggs down before vacating the stinky premises!


I would advise applying after a rain or after watering in the evening. I have heard that these bugs don't prefer the agitation of watering from above like a sprinkler or hand attachment for your hose. I have since been watering from above on my broccoli which was the most attacked and it seemed to make a drastic improvement even before applying this spray.


Since my application last week in our homestead garden I have seen a severe decrease in bugs and eggs in my broccoli and zucchini. Ive also since seen a great couple harvests of both and a couple zucchinis the size of my farmstud's forearm!

Amen to wholesome harvests. And zucchini bread. And fried zucchini. And zucchini hummus. Oh and broccoli out the you know what!

The only other thing I can say about homesteading is, I love it.


How do you defend your crops against pests in your organic gardens? I would love to hear your tips!

Interested in essential oils?


Email Quincy at quincy.burke91@gmail.com with all your homestead techniques and hacks.


Wednesday, July 1, 2015

HOMESTEAD HOGS: A TAIL OF GRATITUDE

"I will not censor myself to comfort your ignorance."
This quote really spoke to me this week. 

I'm sure there's a time in all homesteaders lives when they meet folks who don't see eye to eye with them. The great part about it? We don't have to. And that's ok. But I for one will continue to show my my lifestyle for what it is, a blessing. This may involve a graphic picture/post or two, so I say kindly, if yall don't have anything nice to say then don't say anything at all. I wish not to offend but inform and educate. 


Now let's get down to business shall we?


When animals go to slaughter or a dog is run over by a car it's natural for most parents to tell their young kids something like this:

Well honey good ole spot went to "the farm" to live out the rest of his life at peace.... 

That's all fine and dandy, until your kid gets older and realizes how his childhood friends death was covered up by his parents.... Hey! We only lie when we feel it's better for your well being, ok! That said, our oldest daughter is rounding up on three years old and how we handle her knowledge of the farm animals' circle of life is a delicate topic.


As a youth I wasn't exposed to death right away. But as I grew older my animals husbandry and meat production interested only grew. Until, one day in 6th grade I decided I wanted in on this 4H business. 

So my first Duroc gilt, Monet, came home with me and the rest is history from there. I was in love with pigs! When it came time for auction I felt relieved that she had over weighed at check in and I could sell her as a breeding sow. Well that's more than a decade ago and I'm sure she became bacon at some point. 


Back to my farm kiddo; she loves animals so much she has a hard time showing her love calmly or gently most times. She gets great joy from all she's learning about the homesteading around her. I couldn't be more grateful. 

In the spirit of gratitude, our two hogs went to "the farm," better yet, they LEFT OUR FARM. And for educational purposes I let my little girl be a part of that process as well. She's fed them with daddy, helped to water, and even given them little tests here and there. I felt it was only right to start including her as early as possible. 

Now before anyone gets all gung-ho animal activist on me let me say that I didn't let her watch the shooting or throat slitting parts... If you find a better name for those references tell me... She came out after one hog was already in the air and the other already dead. 

It was a proud moment for me when she walked over to me took and took my hand. She liked up at me smiled and asked:

Piggies all done mama?

Yes honey, piggies all done?

Bacon??

Yes honey, that's your bacon. 


What can I say? My kid loves bacon, and she didn't show one ounce of sadness or confusion. She knew.. and for a two and half year old that kind of understanding is fantastic. 

Before the death of the pigs I spent a moment with each, scratched their snouts and thanked them ever so kindly for their sacrifice. Once Ireland came out, I then had her show thanks. She did so by clapping and shouting:

Tanks! PIGGIES! 


These animals aren't just meat to us. They are one or two meals a day for the next year. They are the rendered fat we will use daily. They are the head cheese I will make for the dogs. They are the bone broth that will supply us viral nutrients. We are ever grateful to that sacrifice they made so that we may eat. We honor that sacrifice by continually giving thanks to our farm critters. 

This lifestyle isn't easy or glamorous by any means. It's dirty, stinky, painful, but so rewarding. Raising our own meat 100% nonGMO and organic was a challenge, it gives me a huge sense of pride. I want to scream from a mountain top:

I DID THAT! I RAISED THOSE PIGS!

Ok ok the farm stud did all the hard work while I was pregnant.. So I know he's proud of that meat. 

And our children deserve to take pride in our achievements. We do things as a family unit. Some feel my choice as a parent, to let her see the truth of how our meat comes full circle, is wrong. To that I say sorry not sorry... The way I see it, the hard part is over, and Ireland will never know the difference. I want her to feel the gratitude I do when I ponder how my food came from farm to table. She is being raised by hardworking farming parents who provide her a wholesome life. I will always be truthful and honest to my children especially in matters of the homestead. Except when it comes to the Tooth Fairy and Santa... 

We now have almost 300# of meat in our future that we're splitting with my parents. That's a lot of bacon, sausage, chops, ribs, steaks, hocks, loins, hams, and roasts to look forward to! Not to mention the head I will make into dog food and the day I will render for cooking!
It will last us almost a year, unless we pig out. 

Sorry. Couldn't pass up that chance..


We plan on acquiring another this fall in hopes to fatten over the winter and run the chance of actually being able to slaughter and butcher independently. Here's to hopin'!


Saturday, June 27, 2015

SO IT GOES..

The day before yesterday morning I woke up knowing exactly how my day would end. For the mother of a newborn and a two year old this kind of certainty is few and far between.

I knew without a shadow of a doubt that our broilers would be in the freezer by nightfall... Boy oh boy was I in for it.

The day started normal as can be. The boys were off to work, the animals were fed, and so I decided to make breakfast and get to some much needed laundry folding.

As luck would have it Murphy felt she needed to eat every hour yesterday morning.... So I spent the whole morning snuggling my girls and being a tad lazy.. The preparations for the killing can wait right?

After all I just need to devise a kill cone, go to moms for they're turkey fryer stand to use for scalding,  borrow a butchering knife from my uncle, go by the market for ice, clean the coolers, find the vacuum freezer bags which I had so conveniently hidden from myself, and clean the kitchen for the end clean up and packaging... only a few things right? Plus I decided since I would be in town I needed to get a few friend visits in while dropping off a rug at a girlfriends house. In case you haven't guessed, spreading myself too thin is a major talent I have..

So I was on my way to my hometown a bit after noon thinking I was gravy; homestead slang for good to go! Or so I thought..

As with all things in life, what can go wrong, will.. A visit here, some chit chat there, errands done, supplies gathered, rug dropped off, and before I knew it its 6 PM! I wanted to be home before 5... But its ok since our plan was for an evening slaughter when the 100 degree weather had subsided... My parents offered to keep farm baby #1 over night in order to ease us in the butcher process, so home I went.

But now I need a propane tank... silly me forgot the key to the scalding process... Idk about you but I'm sure as heck not bringing them birds into the house for that process.

By the time the farm stud returned with said tank the early evening Tumalo wind had kicked up. This alone wouldn't stop me! Set up was going great when dark clouds began to roll in, thunder began to rumble, then came the downpour. I stood in the eve of the garage cursing the clouds for taking away this day I had so looked forward to. After all these birds should have been finished over two weeks ago... key word, SHOULD.

You see its more common than not that farm tasks which SHOULD be complete at a certain date, don't always end up so. Such is the life of a homesteader. Some days go exactly according to plan and still some other plans have to be seriously amended.

The first mishap I caused was at the very end of my pregnancy when I was primed and prepped to worm the birds. Alas pregnancy brain got the better of me and I forgot in the midst of Sisters Rodeo-- weeklong party which involves an annual kickoff party at our house (otherwise known to our close friends as Half Christmas). All I can say about the second week in June is, debauchery and shenanigans in true country redneck style.. Its a wonder I remember my own name after this one week a year. So the birds finally were wormed but a 14 day waiting period is necessary before slaughter.

So here we were.. more than ready for these birds to serve their ultimate purpose. Grateful for the sacrifice they will make. But we called the kill for rain. 

After killing and beginning the clean on the firest bird the next day we found them to be severely underfed. Another mishap in our learning curve. With the heat we have had and a switch to nonGMO barley fodder the last two weeks, the birds seem amaciated.. Another disappointment on the home front. I may have calculated their feed wrong or maybe the weather conditions have contributed. So a higher protein feed and two more weeks was graciously granted these homestead birds. 


We can't butcher birds for no meat, another sad fact of homesteading: getting your moneys worth can be a challenge. 

So again I sat on my porch, beer in hand cursing the circumstances. Yesterday the weather, today the birds are scrauny... What next?!? I found myself hating the birds, their poop, their constant squaking, their state of, well living. Ok ok deep down I love my birds, everything about them.. 

With luck we will be butchering in two weeks. Another postponement we didn't budget for. Homesteading is NOT about perfection, get that through your head Quincy! So it goes.         

At least the pigs are butchered!
                                                                                                                                      

Monday, June 22, 2015

BUILDING A GARDEN BED: HOW MULCH DOES IT TAKE?

After the trials and errors of last years growing season I knew I had to make a change. I spent far too much time weeding and not nearly enough harvesting. I needed to find a natural way to combat weeds and the intense drought we experience at times. I wanted less maintenance! In order to spend my time better, not weeding all day, playing with my kiddo or planting those continuing crops. 

My whole world changed when I finally   listened to someone about mulching. That someone, a Mrs. Jill Winger changed my mind about pristine clean beds forever. When I read an ebook of hers expressing the secrets to winning my war with weeds... Btw y'all should ALL read that little book. 

If y'all are anything like me, there are a million and one things you would much rather be doing than weeding... 

Granted weeding is therapeutic in my mind.... 

What relieves more stress than taking the lives of overgrown and sometimes pointless plants...? Hey, sometimes destruction can be fun.. And lately thanks to those weeds many of my farm animals are eating all natural fresh greens daily. 

Due to the many resources available to help us beginner high desert gardeners I have decided that this year is dedicated to MULCH! Oh yeah baby my beds are covered in last years dead organic matter and all sorts of hay and straw... anything I can find to protect the ground. That is what its about after all... protecting the ground in order to grow amazing soil and harvest bountiful food. 

To find success in homestead gardening I have learned the hard way that the key is in the soil. Start whatever heirloom organic (yada yada) seeds that you want.. If you haven't invested in your soil, you are in for one disappointing harvest..

Trust me from my mistakes!

Unless you come from some voodoo magical place with perfect dirt, hours of work will need to be done to prepare your top soil. This is especially apparent where I live. Bend is....

Dry... Harsh... Fickle.... Central Oregon....

 A common rule of thumb for my region.... If you don't like the weather wait 15 minutes. In other words the whether can turn on a dime... at times with a vengeance!

I have completely changed my idea of gardening. I'm mulching my beds (avoiding my normal OCD clean garden needs), allowing useful weeds to invade (only in areas I allow), and I'm even debating letting my ducks in the garden (once the plants are established and properly netted/secured for their safety)...an extended post on this to come!

Bottom line, mulching is the bees knees of gardening and its so simple.. And such a natural way to combat weeds and bugs!!!

How mulch does it take you ask? Hardly anything! 


I simply pulled up weeds and whatever left over garden greens that had hardened off and left them to die and dry over the top of the beds all winter. Do not clean your beds completely! You don't want to leave your beds open to the elements, this will dry out and deplete the nutrients and integrity of your soil, especially if you've brought in special soil. Instead plant a cover crop, cover with compost/straw, or as I said pull all your weeds and use this as your mulch. 

Adding compost and manure to your beds through out winter is a very good idea. Although adding these in the spring is also fine. You can simply remove your top layer of mulch, add compost or manure, then replace the mulch. When it comes time for planting all you need to do is pull back the straw and plant your seeds directly into the soil. Once established and a couple inches tall you can bring the mulch back in lightly around the base even up to the plants stalk. 

Take this broccoli for example. 


Mulching will help to regulate soil temperature and moisture. In our dry and windy climate these two things are dire to almost any vegetable or fruiting plants. Wanna try another all natural mulching idea? 

Enter the Three Sisters Garden (3SG). Using plants to help other plants, what can be better? This Native American idea takes companion planting to a whole new level..

Corn. Beans. Squash.

Corn eats nitrogen, beans replace nitrogen.

Corn provides a trellis for the beans which help to further stronghold the corn. 

Squash needs minimal shade, the beans and corn provide this.

The squash acts as a natural mulch, covering the roots and bases of the corn and beans to retain moisture. 

These three plants accompany and assist each other in their grow cycle. Simply plant corn after danger of frost. Once they are about 3-5 inches tall plant the beans. 


If you live in a high desert climate like myself I strongly suggest not wasting your time starting corn indoors unless you have a fan on them 24 hours a day. If corn isn't planted outside and taught to withstand our elements, namely the high winds and temp drops of the HD, then you can forget about it....

Once the beans are sprouted and established, about two weeks, you can then plant the squash. There is pattern after pattern on the internet depicting how best to plant these gardens. We chose to plant our corn in a circle, spaced accordingly. The beans are then planted 1:1 in a larger circle outside the corn circle, spaced a few inches from each corn stalk. Then two squashes will be planted in the center. 

There you have it. I'm a little behind schedule bit the beans should be sorouting anyway now! 

Have fun mulching! And harvesting not weeding...

Cheers folks. 

Q


Monday, May 18, 2015

FEEDING THE MEAT RABBITS ON A BUDGET.

Our first seven kits are now six weeks old and I am happy to say they are weaned off mama, eating fabulously on their own. Only three to four more weeks and what bunnies we haven't sold,  as two to three are being sold as pets, will be finished and frozen.


With a recent drop in income on my end of the family bacon winning I have been looking for any extra way possible to save during this time. Hence the beginning of the meat chicken/rabbit adventure.... The frugal bone in me knew there had to be a cheaper way to feed these rabbits. 


In looking around my property, with my refusal to purchase or utilize toxic weed killers AT ALL, one will notice the vast salad of "weeds" everywhere... Well in attempts to jump start a looming labor I have in the last week been weeding twice a day and feeding all my profits to the rabbits! Better yet... I have completely weaned them off of pellet feed. All 15 of my rabbits are now on a 100% all natural, GMOfree, organic, COST FREE....blah blah blah diet! 


I even take the baby bunnies out into a smaller grazing pen everyday. I simply move it about every few hours to give them a new variety. They are currently working around all the beds, rows, and mounds in the garden. Fertilizing as they eat any weeds or grass sprouts. Have I said what gold rabbit manure is??? Seriously come get some, your garden will thank you. Highly nutrient fertilizer + odorless = win for this pregnancy mama and her olfactory nerves!!!


The best part of this new bunny diet is they can't get enough of it. I can't understand why I didn't start sooner. At random I felt like feeding Belle and her babies some fresh greens one day last week and their reaction had me hooked! All across the board they show more interest in these greens than any other pellet feed I have fed them. It gives me piece of mind knowing just how simple this food is, no processing or adding necessary. The rabbits seem happier and my wallet is happier no longer handing over hard earned money for fancy organic feeds.

Of course with the upcoming baby we have saved feed for convenience and we have already delegated a special spot for winter rabbit feed in the homestead budget.

Any dollar saved is a dollar earned, especially in our case! Our next homestead purchase needs to be a cutlery set for butchering and processing all this meat...


--->two pigs to be slaughtered the first week of June

--->19 meat chickens to be slaughtered first week of June

--->5-10 meat rabbits to be slaughtered mid June

Safe to say we have a few burners going! And baby #2 hasn't even been born yet! But we wouldn't have it any other way..

And all is well for fresh grazed rabbits..


Saturday, May 2, 2015

HOW TO: HOMEMADE POMADE

This post contains affiliate links!

In honor of our 5 year anniversary last week on the 26th and baby shower for little girl #2 I wanted to make a special post about the love of my life. Yes, it is a little late in the making, but hey I have had baby bunnies and sprouting plants coming out  my ears the last two weeks so better late than never here ya go!

For anyone who knows my main man Spencer, presumably you've heard about his hair. Being divinely blessed with better hair than me the man has tried many hairstyles, I can't say that all have been of his choice... though he chooses yours truly to maintain his do.... and yes hes ended up with a buzz cut or two.... at my hands :( 

Over the last 5 years with him I can safely say I have become quite gifted with scissors and a set of clippers. 

When we first started dating we actually had the same length hair... no joke. He was still rocking the 90's kid long hair and I had in a time of needed change, chopped my hair. It grew and grew, every time we saw his family it was hey boy when ya gonna cut that hair! I loved it, but alas he couldn't maintain it nor cool down in the summer. The first time he asked me to cut it we ended up one misshaped hair cut turned buzz cut later and the poor guys was done!


As I said before if you know Spencer then you've know about his hair....


Man bun in full force...


Long hair don't care...


I will say I grew to love that hair..


Mop top as it was at times...


Okay I'm wearing a pony tail, but yes, at one point his hair was longer than mine.


And at times to my dismay, he even rocked the pig tail braids!

So when he came to the point after almost 4 years of all-natural no cuttin' hair growth he decided he was again, done done! The struggle to find a hair style that works for him and doesn't require my personal touch daily was also necessary. The long hair was too hot, too much maintenance, and at times I will say people got handsy with it.... So we settled on a modern type pompadour style which I can say is the sexiest hair cut he will ever wear... What? Mama got no shame about that! A man with a good hair cut and a beard is enough to.... well you can use your imagination...

When my love was offered a job of town he needed a reliable pomade to keep his do slick! In order to avoid the cost of spendy pomades, he was bringing back the 80's.... the smell of AquaNet will forever remind me of him. With my frugal nature and cheap-skatedness (thank you Daddy!) I knew there must be a cheaper and healthier way to maintain the mane that didn't include overwhelming sprays or $15-$20 crew pomade. 

When I began the transition to take our family out of consumerism and turn us into producers, part of that meant making our own bath and beauty products. So when I came up with a recipe for homemade pomade right before he left, we jumped on the chance to stock him up for a couple months. 


Bad quality photo^^^--- but this was the finished product after a public hair cutting giving him a Cobain-esque do and a donation to locks of love. 


This homemade pomade makes me want to jump for joy... its oh so fresh, and so clean! Only 4 ingredients whip up this awesome product... Can you say GMO, petroleum, and chemical free? I can.. homemade pomade! It is organic and only takes about 30 minutes to fill 3 tins, need I say more???


All you need is coconut oil (which I purchased organic, virgin, and GMO-free at our local Costco) Shea butter also works for this portion, almond oil (or some other carrier oil, i.e. jojoba oil, grape seed oil, olive oil), beeswax pellets, and arrowroot powder. I also purchased the small storage tins through Amazon, here!

Let's get started--->

3 tbsp beeswax

2 tbsp coconut oil

2 tbsp almond oil

1 tbsp arrowroot powder

2 vitamin E pills (optional --- in case you will store it up to 6 months) I couldn't find an organic option online so I opted out --- I'm sure there are options out there, when I find them you'll know!!!

  1. In a double boiler, melt the beeswax with coconut oil, stirring enough. You love my pyrex bowl/saucepan double broiler huh? 
  2. When the beeswax and coconut oil is melted, let it sit on heat for 20 minutes to process the coconut oil.
  3. Mix the arrowroot powder and almond oil separately in a small bowl, until arrowroot is dissolved. If using Vitamin E poke vitamin E pills with a pin squeezing the contents into the bowl and let it cool until it's hardened.
  4. Remove coconut/wax mixture from heat then and add arrowroot/almond oil mix.
  5. Using my handy dandy super old school hand blender, or you can use your super awesome modern electric hand mixer... pshh.... blend the pomade until it begins to turn into a pudding like texture. 
  6. Scoop into metal tins and store in a cool dark place. If pomade gets too cold it can be hard to use, same goes for too hot. If you encounter these issues place it in the sun or the freezer for about 10 minutes and it will set back up wonderfully :) it's all natural folks, no emollients or emulsifiers to keep it from doing what nature intended.
  7. Use a pea sized amount on hair, it goes a long way :) 

My super fancy high class double broiler!


Mixing the arrowroot powder and almond oil...


This is the consistency once powder/oil is mixed and fully dissolved...


Another super official tool, baby spoons work great as mini rubber scrapers!


Talk about homestud hair! WHAM BAM! 

Anything to keep this guy looking fly! Happy Anniversary best friend!

Cheers folks!

Q